Backing Up Data w/Backblaze B2 and restic
November 08, 2022
On my NAS, I have configs, application data, and numerous files that I want to be backed up. Most folks believe one of the following two things:
A) "I use RAID or zRAID; therefore, I don't need backups."
B) "Backups are too hard to set up."
First, RAID is not a backup. RAID is not impervious to issues. Even if you have the ability to lose several drives before data loss occurs, what if your system sustained a power surge or fire, etc.? How would you recover your data then? Also, it's a fair assumption to assume the potential for ransomware and erroneous/malicious applications.
Second, when it comes to backups being "hard" to set up, I feel you. However, after several years of trial and error, I have come up with my favorite way of backing files up. Let's take a look at the setup!
Tools Used
- restic
- A wonderful program to efficiently back up and restore data (supports encryption, compression, and verification).
- Backblaze B2
- An S3 storage provider that charges you pennies per GB. Absolutely incredible!
- Local system
Before we get started, I want to note that I am not affiliated with either restic or Backblaze nor am I sponsored/supported by them. I truly love using their products, as a customer, so that is why I am recommending them. Thanks!
Backblaze B2 Setup
If you have not signed up for an account with Backblaze, please do so before continuing.
Bucket Creation
- First, log in to your Backblaze B2 account and browse to the Buckets page.
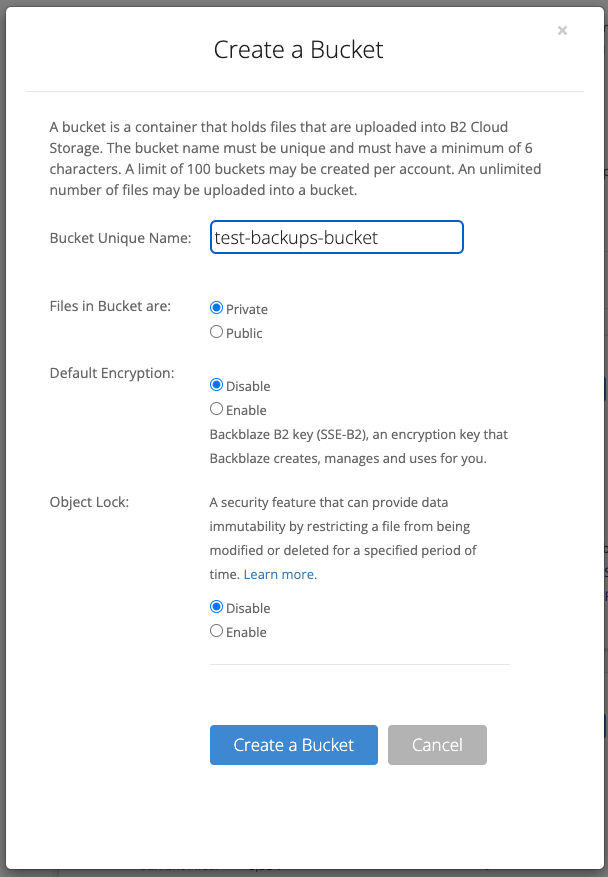
- Select Create a Bucket at the top of the page.
- Name the bucket whatever you'd like. For this article, we're going to use the name test-backups-bucket.
- Make sure to set the bucket to Private. Encryption can be disabled or enabled depending on your preference. restic will encrypt our data anyway so, up to you!
- Lastly, set Object Lock to Disabled.
- Select Create Bucket.
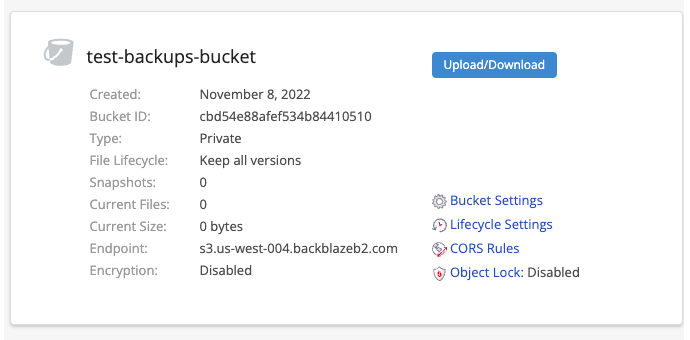
- On the buckets page, you will see your new bucket!
Generating Credentials
- On the left-hand side of the page, select App Keys (under Account).
- While you could just use your Master Key here for your backups, it's highly recommended not to (for obvious security reasons).
- Select Add a New Application Key.
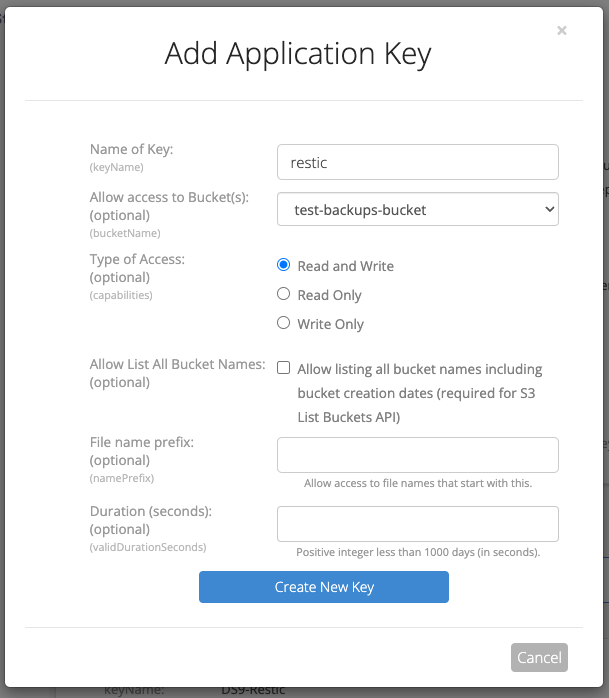
- Name your new key. For this example, we're going to use the name restic (since that is the app that will be utilizing the key).
- Select only the bucket you created for backups. This way, if the key becomes compromised, your other buckets will not be impacted.
- Grant the key Read and Write access.
- You can leave the remaining fields as their default.
- Select Create New Key.
- You should now see your new key. This is the only time you will see this key's details - it's hidden immediately after browsing off this page. I recommend dropping them into a password manager such as Bitwarden or LastPass, etc.
- You can now close the Backblaze B2 tab/window.
restic Installation and Configuration
Installing restic
- Drop binary onto the system, chmod +x it, and run!
- Docker image (restic/restic)
- From source
- Via your favorite package manager such as pacman, yum, dnf, apt, brew, etc.
You can find the full list (and instructions) on their readthedocs site.
Choose your favorite method and let's get started!
Initializing Our Repository With restic
Let's go over the terminology here. The Backblaze B2 bucket is where our data resides. The restic repository is where our backups and snapshots are stored.
- First, we need to provide restic with our Backblaze B2 Application Key that we created a few moments ago. For this example, we'll use environment variables:
export B2_ACCOUNT_ID=$keyID (from steps above) export B2_ACCOUNT_KEY=$applicationKey (from steps above) - Next, let's initialize our new repository:
restic -r b2:$bucketName: init
Notes:- b2 is the service.
- $bucketName should be the name of your bucket from the beginning of this article (ex. test-backups-bucket).
- : is the path. We're going to only use this bucket for this one service so we're going to store it in the root of the bucket. If you want to store it at a specific path, just use :path/to/destination/folder.
For our example, our command will be:
restic -r b2:test-backups-bucket: init - You'll then be prompted for a password. This password is what protects your repository. If you lose it, you lose your data.
- If all goes well, you should see a message saying that your repository was successfully created!
created restic repository 8c3dc78f72 at b2:test-backups-bucket:
Our First Test Backup
- Let's try to back up our super-important-folder /example:
restic -r b2:test-backups-bucket: backup /example - You'll need to enter your restic repository password from the last step.
- After restic does its magic, you should see a summary of its work:
repository 8c3dc78f opened (repository version 2) successfully, password is correct created new cache in /root/.cache/restic no parent snapshot found, will read all files Files: 3 new, 0 changed, 0 unmodified Dirs: 1 new, 0 changed, 0 unmodified Added to the repository: 1.181 KiB (588 B stored) processed 3 files, 0 B in 0:01 snapshot 91488291 saved - Told you it was easy!
Our Second Test Backup (yes, really!)
I want to show you what restic does moving forward.
- If a file is changed, it'll update it.
- If a file is new, it'll add it.
- If a file is deleted, it'll remove it.
- If a file is unchanged, it'll do nothing.
You get the point! restic is efficient in the copy process. So, if we run our backup job once more...
repository 8c3dc78f opened (repository version 2) successfully, password is correct
using parent snapshot 91488291

Files:           0 new,     0 changed,     3 unmodified
Dirs:            0 new,     0 changed,     1 unmodified
Added to the repository: 0 B   (0 B   stored)

processed 3 files, 0 B in 0:01
snapshot d652c5d5 saved
...you can see that it didn't have to waste any time uploading already-uploaded files! Cool, right?
Gotchas and Advice
- When using restic, keep in mind that you need to provide your Backblaze B2 Application ID. This is in the form of the two environment variables from above (B2_ACCOUNT_ID and B2_ACCOUNT_KEY).
- You can pass your restic repository password into restic by exporting another environment variable, RESTIC_PASSWORD_FILE and setting it equal to a file that contains the password.
- You can exclude files by adding --exclude-file=excludes.txt into your restic backup command. This file can just be a list of files that you wish to exclude.
- I, typically, add --verbose --verbose (yes, two) to get the most information about my backup jobs.
Going Forward
Managing backup jobs is quite an interesting ordeal. To get around some of the issues I had, I dumped this restic job into Jenkins. "Isn't Jenkins a CI/CD application, Tyler?" Why, yes, yes it is! By using Jenkins, I get the following:
- A UI to edit my restic jobs with
- A UI to look at previous job logs/history
- Built-in functionality to email and post to Discord when my backups fail
- Built-in functionality to execute these backups on remote machines via SSH
An example Jenkins job of mine is one that backs up all of my Docker app data (so, if anything is running in Docker, they store their files here). I didn't want to include some files like those used by Plex for caching. Here's the build step which is an execute shell script on remote host using ssh block:
echo "/AppData/Plex/Library/Application Support/Plex Media Server/Cache" > excludes.txt
echo "/AppData/Plex/Library/Application Support/Plex Media Server/Plug-in Support/Caches" >> excludes.txt

export B2_ACCOUNT_ID=$keyID
export B2_ACCOUNT_KEY=$applicationID
export RESTIC_PASSWORD_FILE=$passwordFile

restic -r b2:AppData: --verbose --verbose backup /AppData --exclude-file=excludes.txt