Backup pfSense with Restorepoint
April 29, 2021
While Restorepoint doesn't support backing up pfSense out-of-the-box, you can configure it as a generic device and back it up over SCP. Here's how to set it up!
In this example, we'll be using:
- Restorepoint v5.3
- pfSense v2.5.1
Configure pfSense
Create Service Account
- Login to pfSense's web UI and browse to System > User Manager.
- Under Users, click Add.
- We'll give this service account user a name and password. For this example, we'll use restorepoint as the username.
- Once done, click Save.
- When the page reloads, edit the new service account user.
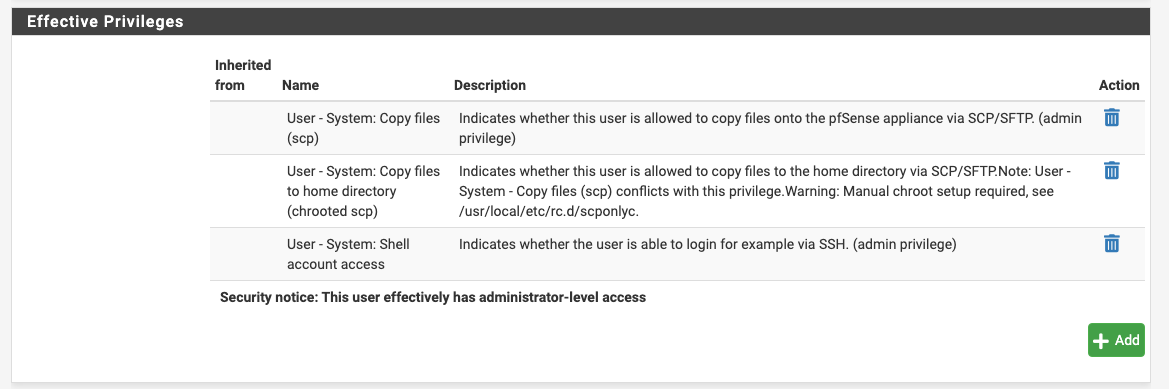
- Under Effective Privileges, select Add.
- Select the following privileges:
- User - System: Copy files (scp)
- User - System: Copy files to home directory (chrooted scp)
- User - System: Shell account access
- Once done, click Save.
Tweak Shell Prompt for Compatibility
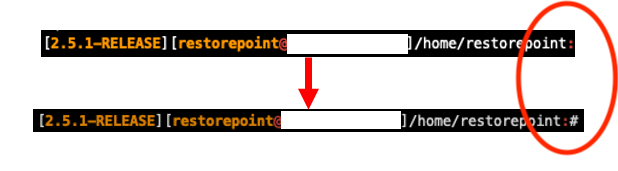
Next, we need to tweak the shell prompt because at the time of this writing, with Restorepoint v5.3, a ":" is not recognized as being the "waiting for user to type in command" type of character. Restorepoint is expecting something like ">" or "#" - so let's fix that.
- Navigate to Diagnostics > Edit File.
- Select Browse and open up /home/restorepoint/.tcshrc.
- Update the line that begins with set prompt= to have a "#" at the end.
- Once done, click Save.
Configure Restorepoint
- Lastly, we can now browse to our Restorepoint instance and login.
- Navigate to Devices and select Add Device.
- Set the Type to Generic File Copy.
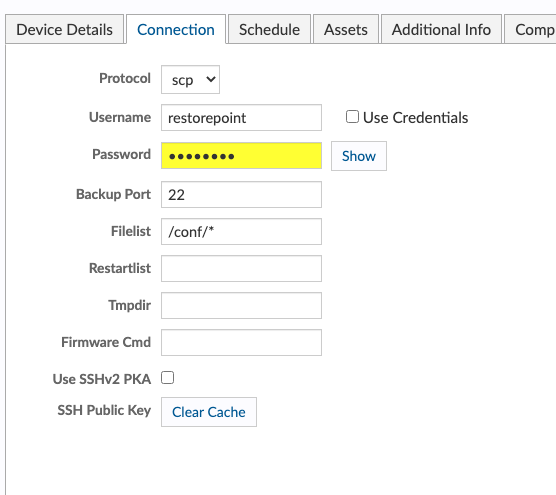
- Fill out everything as you would a normal device.
- On the Connection tab, set the Protocol to SCP. Then set Filelist to /conf/*. This includes all backups. You can alterantively set this to only backup the current config which can be found at /conf/config.xml.