Create a Custom Sized FreeDOS Boot Image (and how to PXE boot it)
May 19, 2018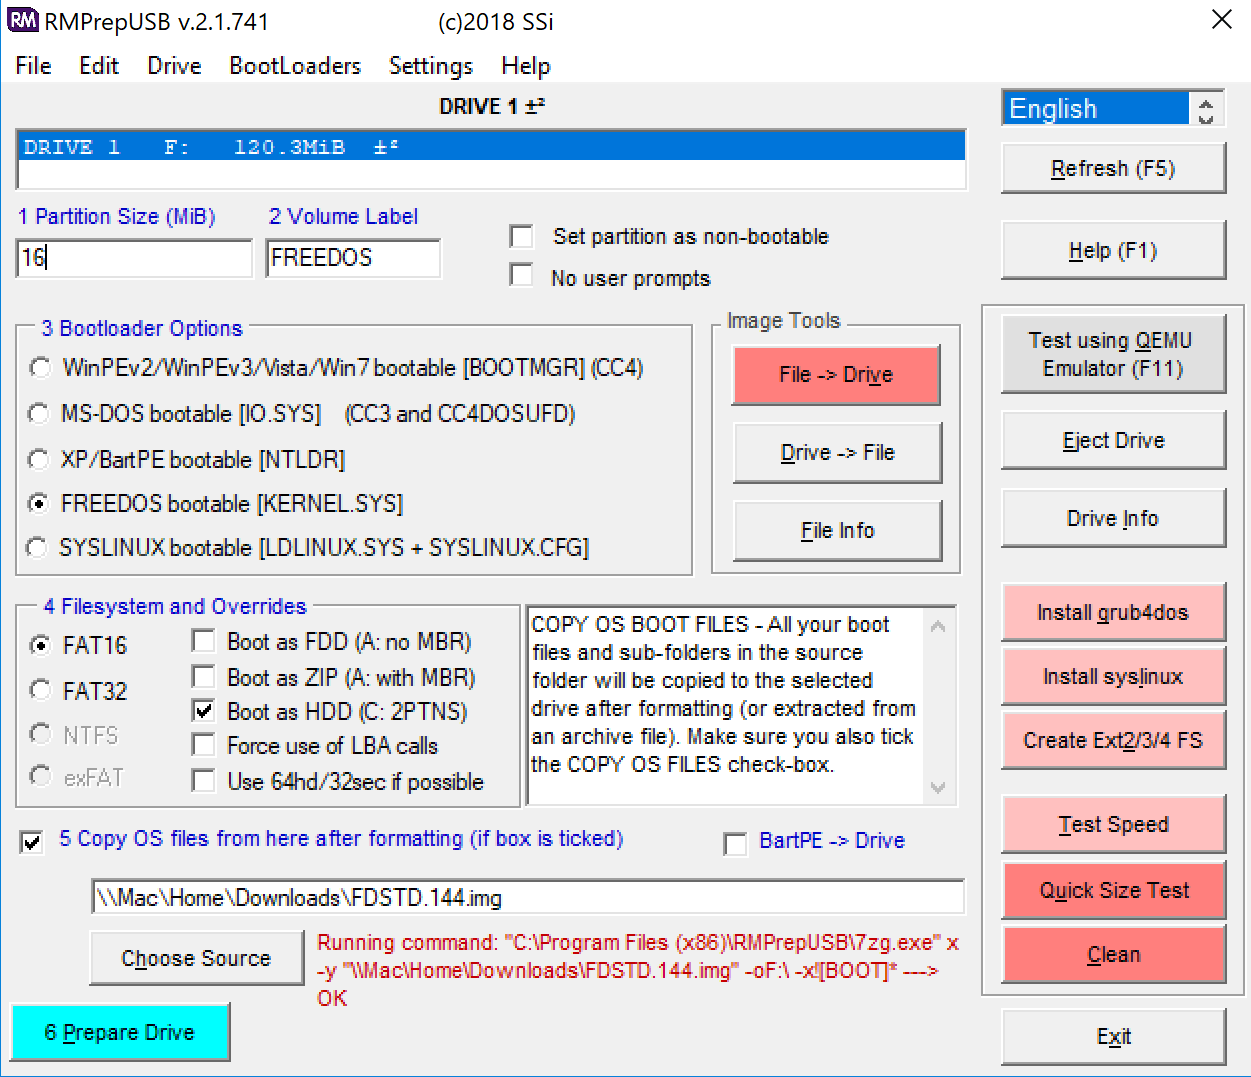
Background and Objectives
At work, we give Dell Dimension Txxxx desktops out to our users which run Fedora. Due to the installed OS not being Windows, we have been unable to find an easy way for users to flash their systems with Dell's Windows-only BIOS upgrade package...until now. In this article, we'll go over how we've worked around this issue and how you can also!
The process is somewhat odd. We're first going to create a flash drive of FreeDOS and inject our BIOS upgrade program. Then, we'll dd the flash drive's contents over to an .img file but only copy over the amount of megabytes actually used. Why, you ask? This helps keep our .img as small as possible which will decrease the amount of data our desktops need to pull down during PXE (also, keep in mind, this data gets stored in RAM so if it's ~20MB, you're perfectly fine on virtually any system).
Instructions
Gather the Materials
You'll need the following:
- RMPrepUSB (https://www.rmprepusb.com/documents/release-2-0) - Used to make flash drive w/FreeDOS and make partition as small as we'd like! This is the major reason why we used RMPrepUSB over Rufus or UNetbootin.
- FreeDOS Boot Image (http://www.fdos.org/bootdisks/) - You need a DOS environment in order to execute the EXE so FreeDOS will take care of that. I prefer the 1.44MB image (http://www.fdos.org/bootdisks/autogen/FDSTD.144.gz). Make sure to extract it! Also, please add .img to the end of the filename.
- The software you wish to run. For us, we've grabbed a BIOS upgrade EXE from Dell's support website.
- A flash drive (or an SD card) to create the bootable environment on.
- A Windows box to run RMPrepUSB and a macOS or Linux box to dd the finished flash drive to an .img file.
Preparing and Creating the Flash Drive
- On a Windows box, download RMPrepUSB, the FreeDOS boot image, and your software of choice (again, in our case, this is a BIOS upgrade packaged into an EXE file).
- Plug in a flash drive (or an SD card) (size doesn't matter) and launch RMPrepUSB.
- You'll first want to select your flash drive at the top of the window.
- Next, let's do some quick math. The FreeDOS boot image is 1.44MB and the BIOS upgrade EXE is 9.45MB. Due to this, we'll set the partition size to be 16MB (just in case the EXE gets slightly bigger in the future). Again, since we're going to PXE boot this image, we want it to be as small as possible.
- Under Bootloader Options, select FreeDOS. When prompted if you wish to copy over files, choose Yes.
- Under Filesystems, make sure FAT16 has been selected.
- At the bottom, select Choose Source. When prompted, click No since we'll be using the .img file.If you haven't already done so, please add .img to the ending of the image's filename.
- Select the FreeDOS boot image that we downloaded and extracted earlier.
- Lastly, click Prepare Drive.
- The drive will be formatted and 7zip will kick off the extraction.
Injecting our Files
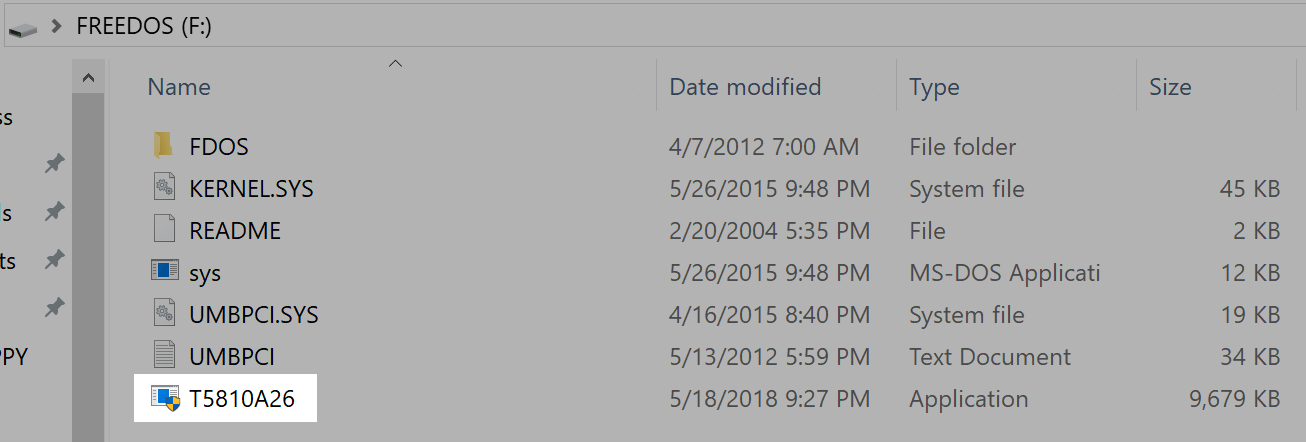
- Now that the flash drive has been created, open Windows Explorer and browse to it.
- Drop your program into the root of the drive.
- In addition, we'll want to make it auto launch upon start. We can do this by replacing the contents of AUTOEXEC.BAT with:
@echo off set PATH=.;C:\;C:\LOCALE display con=(ega,,1) T5810A26.exe - We'll also want to remove some lines from CONFIG.SYS. It should be modified to look like this:
FILES=20 BUFFERS=20 SHELLHIGH=\COMMAND.COM /E:256 /P - Eject the flash drive.
At this point, you may wish to use the USB flash drive as-is. If you wish to make the image PXE-able, continue on!
Creating an .img of the Flash Drive
- Switching over to a box with dd (any Linux distro or macOS), plug in the flash drive.
- Find the drive's path:
- Linux: fdisk -l
- macOS: diskutil list
- Unmount the drive:
- Linux: umount -l $disk
- macOS: diskutil unmountDisk $disk
- Now, let's dd the drive into an .img:
sudo dd if=$disk of=output.img bs=1m count=$sizeOfPartitionPlusOneMB- $disk = The disk you just unmounted (ex. /dev/disk2)
- output.img = Whatever you want to call it. I use this format: Dell-T5810-BIOS-Upgrade-A26-FreeDOS.
- $sizeOfPartitionPlusOneMB = The total amount of MB you wish to "bring over." We're taking the entire partition plus MBR which we assume is a megabyte or less. If we don't take this extra megabyte and grab MBR, the image will not be bootable.
Configuring PXE
- On your PXE server, add the following to the menu of your choosing:
LABEL Dell T5810 BIOS Upgrade (A26 w/FreeDOS) MENU Dell T5810 BIOS Upgrade (A26 w/FreeDOS) KERNEL memdisk APPEND initrd=FreeDOS/Dell-T5810-BIOS-Upgrade-A26-FreeDOS.img - Copy your .img file that you just created and make sure it aligns with your PXE boot menu item's path.
- Note: If you don't have memdisk, you can grab it here: https://mirrors.edge.kernel.org/pub/linux/utils/boot/syslinux/. Extract the zip or tar and then grab memdisk from: bios > memdisk > memdisk.
Testing
See, that wasn't so bad! Now, on your client, PXE boot it and boot from your new option. You should get a FreeDOS prompt, of which, you can now execute your EXE(s).