And that’s it! Simple and easy DNS load balancing with KEMP’s LoadMaster platform.
Load Balance DNS with KEMP LoadMaster
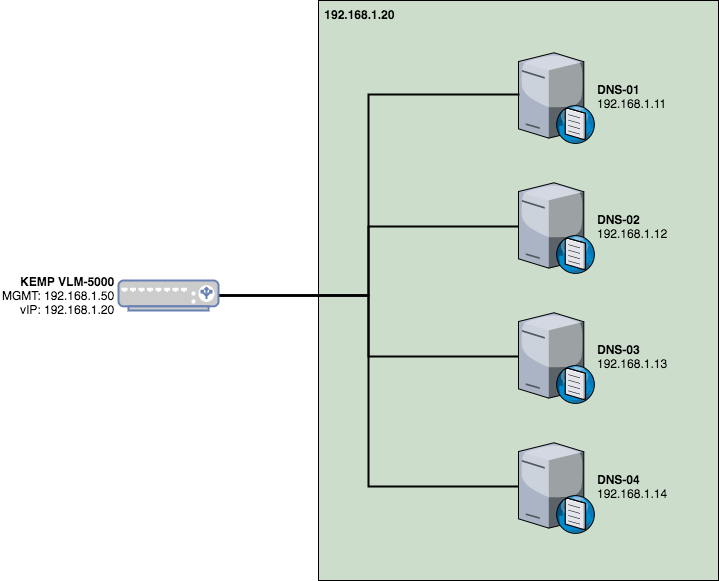
March 15, 2018A good sign of a production topology is having multiple DNS servers in case one goes offline either by choice (upgrade, modification, etc.) or due to a hardware/software issue. Instead of handing out a handful of addresses of your many DNS servers, you can load balance with KEMP and have one IP address. When one of the DNS servers goes offline, the load balancer will automatically disable that server until it comes back online. Here’s how to do that!
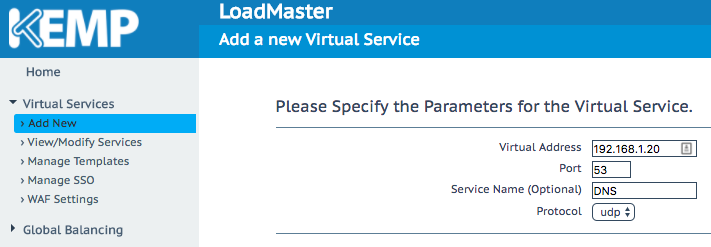
Navigate to your KEMP LoadMaster instance and click on Virtual Services and then Add New. We’ll set the Virtual Address to the IP that users will be given, port to 53, service name to DNS, and protocol to UDP.
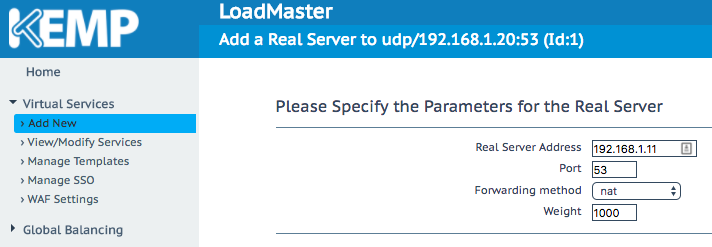
On the next page, we’ll set scheduling method to round robin and then click on Add New under Real Servers.

On the Add a Real Server page, we’ll add each DNS server by putting in the IP and setting the port to 53.
This is what the virtual server should look like. Once everything looks good, click Back.
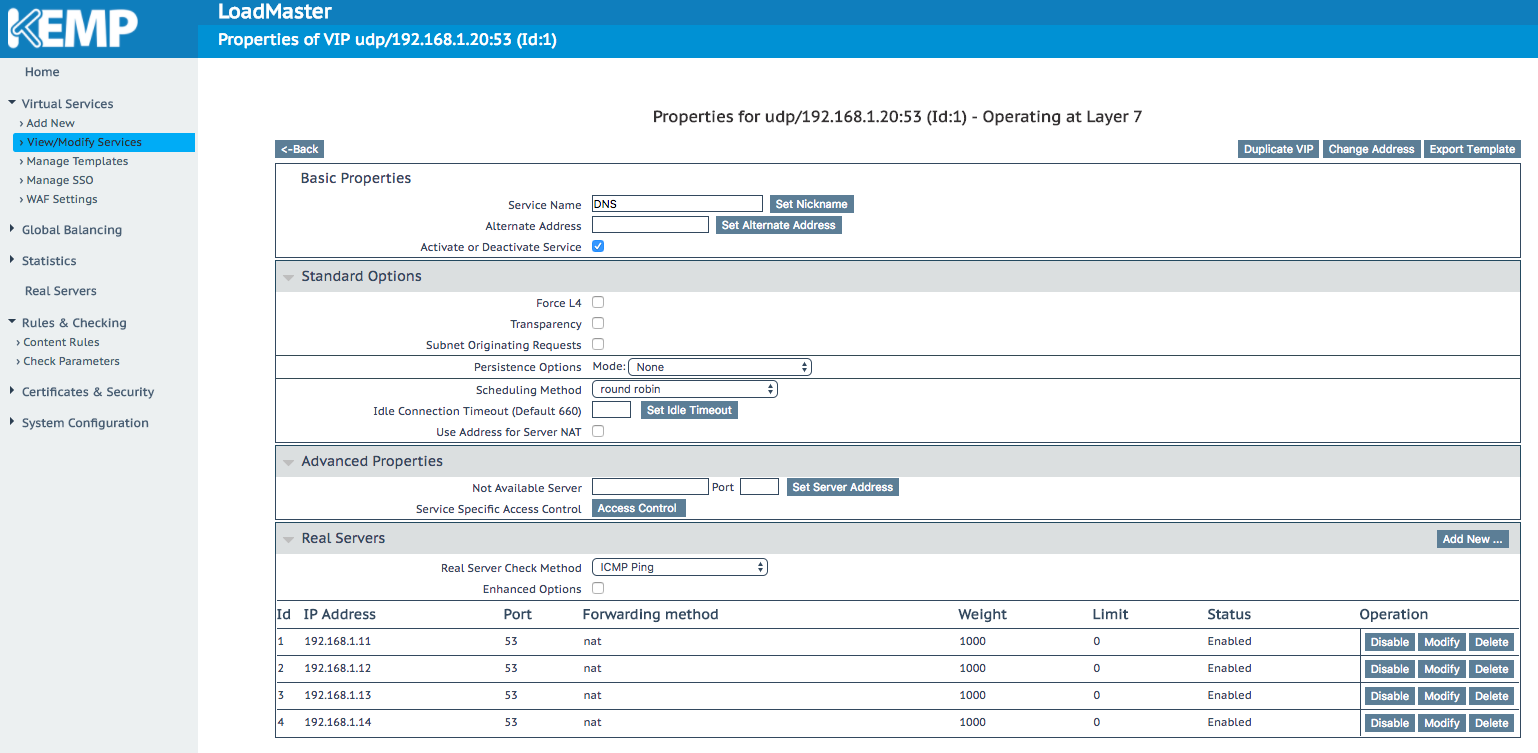
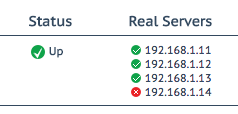
Under Virtual Services, click View/Modify Services. You should be able to see our new virtual server (that is online) and all four of our DNS servers (which are also online).

Let’s try it out:
VM> nslookup DNS-01.example.com 192.168.1.20
Server: 192.168.1.20
Address: 192.168.1.20#53
Name: DNS-01.example.com
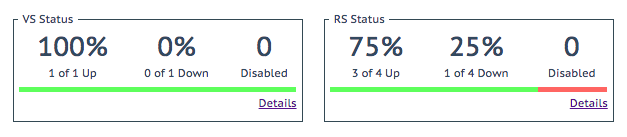
Address: 192.168.1.11Now, let’s take one of our DNS servers offline. We can see the status of the virtual server change:
Let’s make another query and see if it still works:
VM> nslookup DNS-01.example.com 192.168.1.20
Server: 192.168.1.20
Address: 192.168.1.20#53

Name: DNS-01.example.com
Address: 192.168.1.11