Using Hitachi Content Platform as Backend Storage for JFrog's Artifactory
June 14, 2019
JFrog's Artifactory is an all-in-one solution for hosting repositories locally. The available repo types are as follows:
- Bower
- Chef
- CocoaPods
- Conan
- Conda
- CRAN
- Debian (apt)
- Docker
- Gems
- Git LFS
- Go
- Gradle
- Helm
- Ivy
- Maven
- npm
- NuGet
- Opkg
- Composer
- PyPi
- Puppet
- ABT
- Vagrant
- RPM
- Generic
Isn't that an incredible list? It gets better: not only does Artifactory support local repositories, they also support remote repositories so that you can proxy requests from your Artifactory instance to an external repo such as mirror.centos.org. Any requests made will be cached so that the next person who attempts to retrieve them won't have to be proxy'd to the external repo.
We'll go over the additional reasons as to why you should choose Artifactory over alternatives in another post. Today, we're going to take a look at how easy it is to configure Artifactory to use your Hitachi Content Platform storage.
- At the time of publishing this article, Artifactory does not support migrating from one "filesystem" to another. If you already have Artifactory populated with data, please consider spinning up a new instance, binding the new instance to HCP, and then migrating your data over via replication.
- Artifactory will report that your HCP has infinite storage. This isn't really an issue as you can view your storage utilization via the tenant or namespace browser of HCP.
I work for Hitachi Vantara who are the creators of Hitachi Content Platform.
- Hitachi Content Platform 8.1.2
- Artifactory 6.10.3 on CentOS 7
Configuring HCP
Creating a Tenant
If you already have a tenant created, you can skip this step. For this example, we'll create a tenant for our infrastructure team.
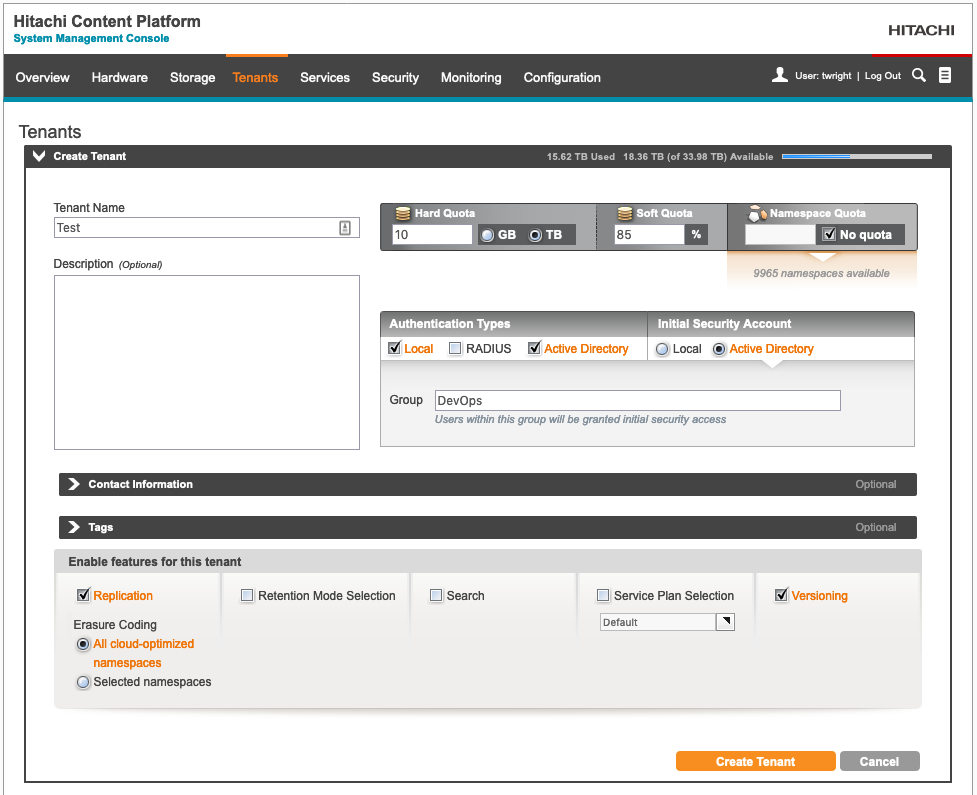
Once logged into HCP, click on Tenants and then select the Create Tenant dropdown. Give it a name, a hard/soft quota, a namespace quota, set an AD group to administer the tenant (optional) and enable local authentication so that we can create a service account for Artifactory later on. Also, be sure to enable Versioning. Once done, click Create Tenant.
Once the tenant has been created, browse to it and login. We'll navigate to Security > Users and add a new local user for Artifactory. This will be its service account. Please tweak the roles as you see fit.
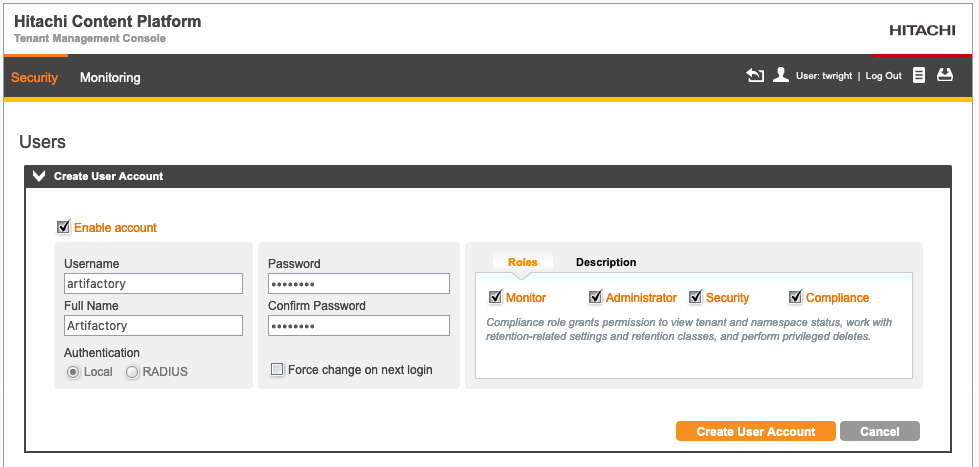
After selecting Create User Account, you should be presented with credentials in the form of an access key : secret key. Keep this safe for later.
Creating a Namespace
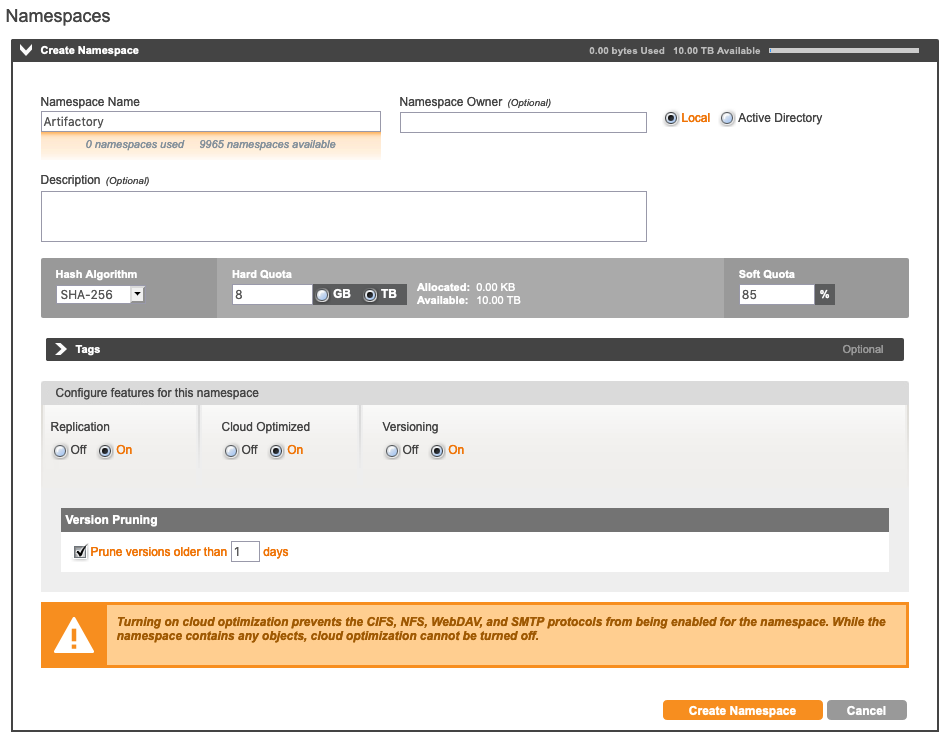
Create a new namespace by browsing to Namespaces and then selecting Create Namespace. We'll call this namespace Artifactory - this is similar to an AWS bucket. In this example, we will set Replication, Cloud Optimized, and Versioning to On. In addition, Version Pruning will be set to 1 day. Once done, select Create Namespace.
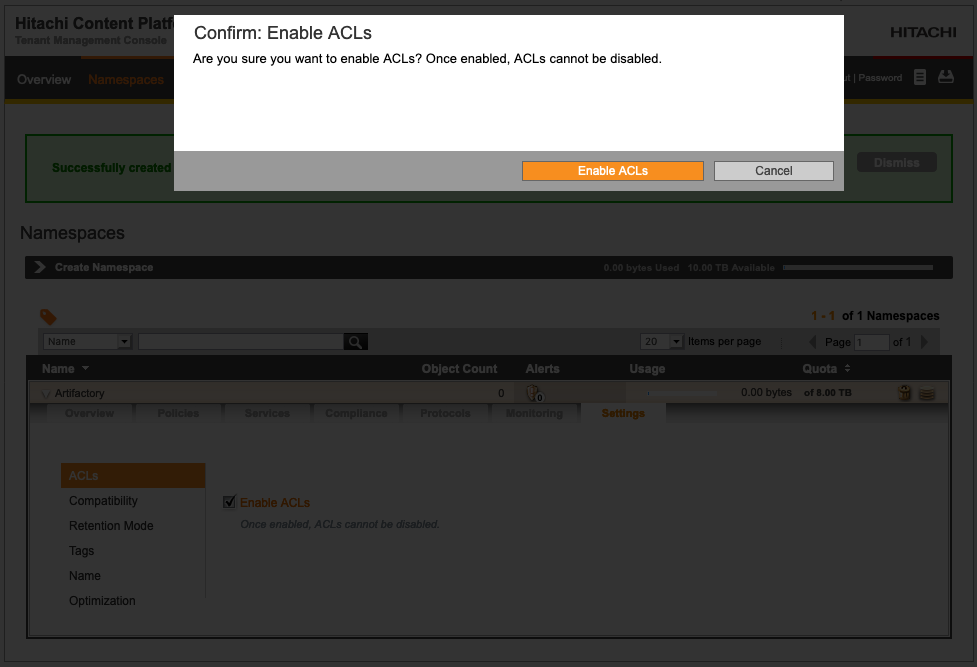
Click on the newly created namespace and browse to the Settings tab. Check the Enable ACLs box under ACLs. When you receive the pop-up asking to confirm, select Enable ACLs.
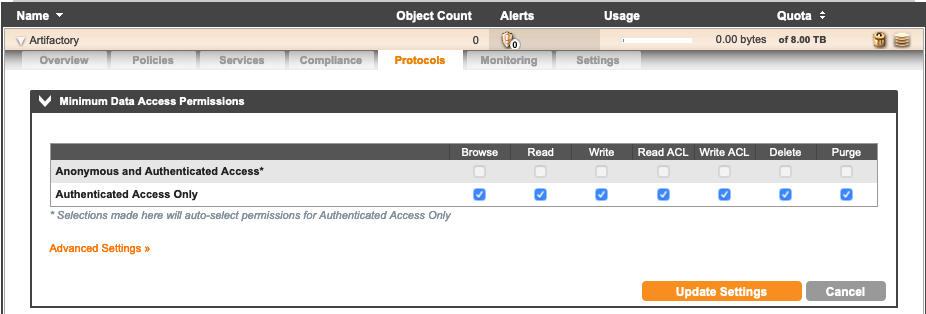
Navigate to the Protocols tab and select Minimum Data Access Permissions. Check all boxes for Authenticated Access Only. Click on Update Settings once done.
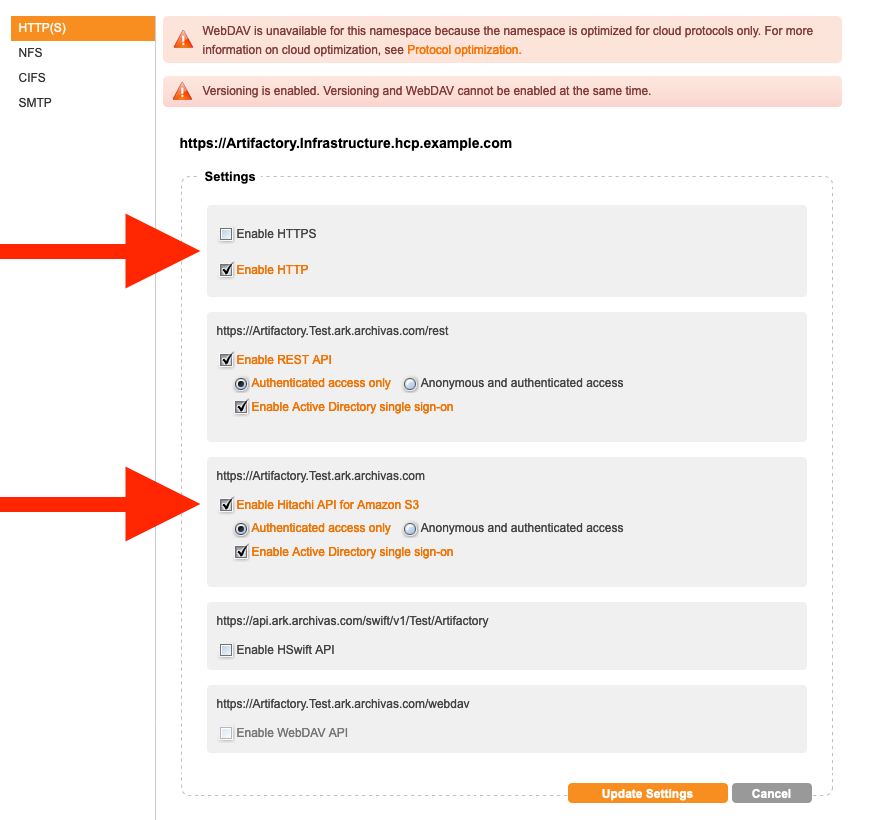
Below, enable your choosing HTTP and/or HTTPS. For this example, we'll be using HTTP. In addition, enable S3 by selecting Enable Hitachi API for Amazon S3. Select Update Settings. When asked to confirm, click on Update Settings.
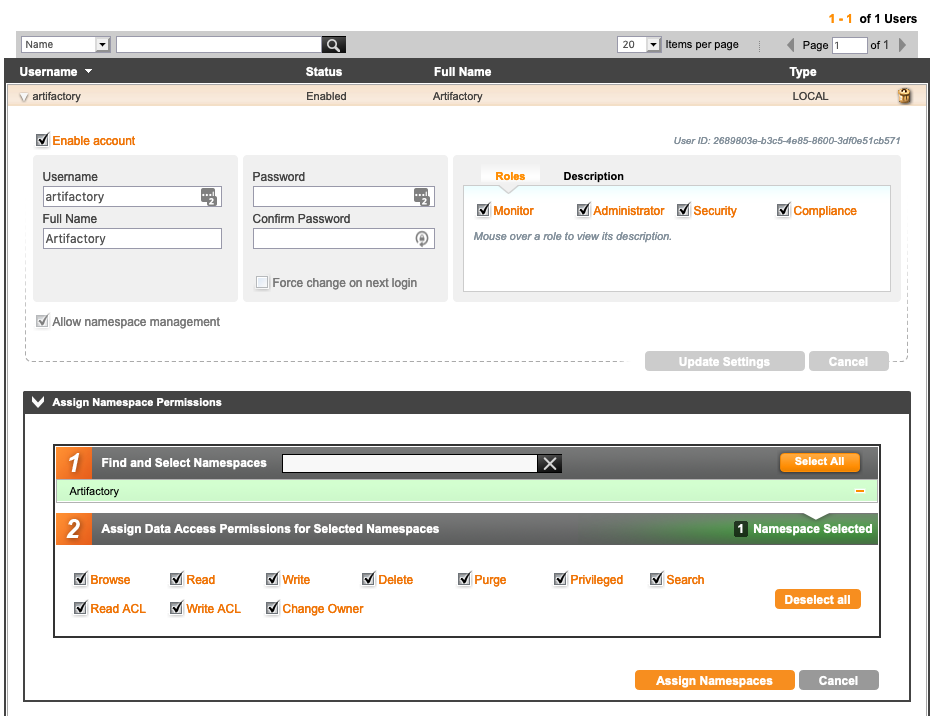
Lastly, browse to Security > Users. Select the artifactory local account and click on the Assign Namespace Permissions dropdown. Select the Artifactory namespace and then click the Select all button to grant all permissions to this account. Now, click on Assign Namespaces.
Configuring Artifactory
In this step, we need the endpoint URL as well as the access and secret key. The keys are what you noted earlier after the account creation. If you have forgotten to note the keys, you can regenerate them by browsing to the tenant (Security > Users page) and selecting Generate Authorization Token (bottom right of page). Remember that the access key is before the ":" and the secret key is after the ":" as shown below:

We're now ready to turn Artifactory off:
systemctl stop artifactoryWith the Artifactory service shutdown, put the following contents in /etc/opt/jfrog/artifactory/binarystore.xml. Make sure you swap the endpoint URL, access key, and secret key. Please feel free to tweak this config. The only items that must stay are: endpoint, identity, credential, bucketName, and s3AwsVersion.
<?xml version="1.0" encoding="UTF-8"?>
<config version="v1">
   <chain>
      <provider id="cache-fs" type="cache-fs">
         <provider id="eventual" type="eventual">
            <provider id="retry" type="retry">
               <provider id="s3" type="s3" />
            </provider>
         </provider>
      </provider>
   </chain>
   <provider id="s3" type="s3">
      <testConnection>true</testConnection>
      <endpoint>http://Artifactory.Infrastructure.hcp.example.com</endpoint>
      <port>80</port>
      <httpsOnly>false</httpsOnly>
      <identity>Access Key</identity>
      <credential>Secret Key</credential>
      <bucketName>Artifactory</bucketName>
      <s3AwsVersion>AWS4-HMAC-SHA256</s3AwsVersion>
   </provider>
   <provider id="cache-fs" type="cache-fs">
      <maxCacheSize>500000000000</maxCacheSize>
      <cacheProviderDir>cache</cacheProviderDir>
   </provider>
   <provider id="eventual" type="eventual">
      <numberOfThreads>20</numberOfThreads>
   </provider>
   <provider id="retry" type="retry">
      <maxTrys>10</maxTrys>
   </provider>
</config>
Last step is to bring Artifactory back online:
systemctl start artifactoryTesting Artifactory with HCP
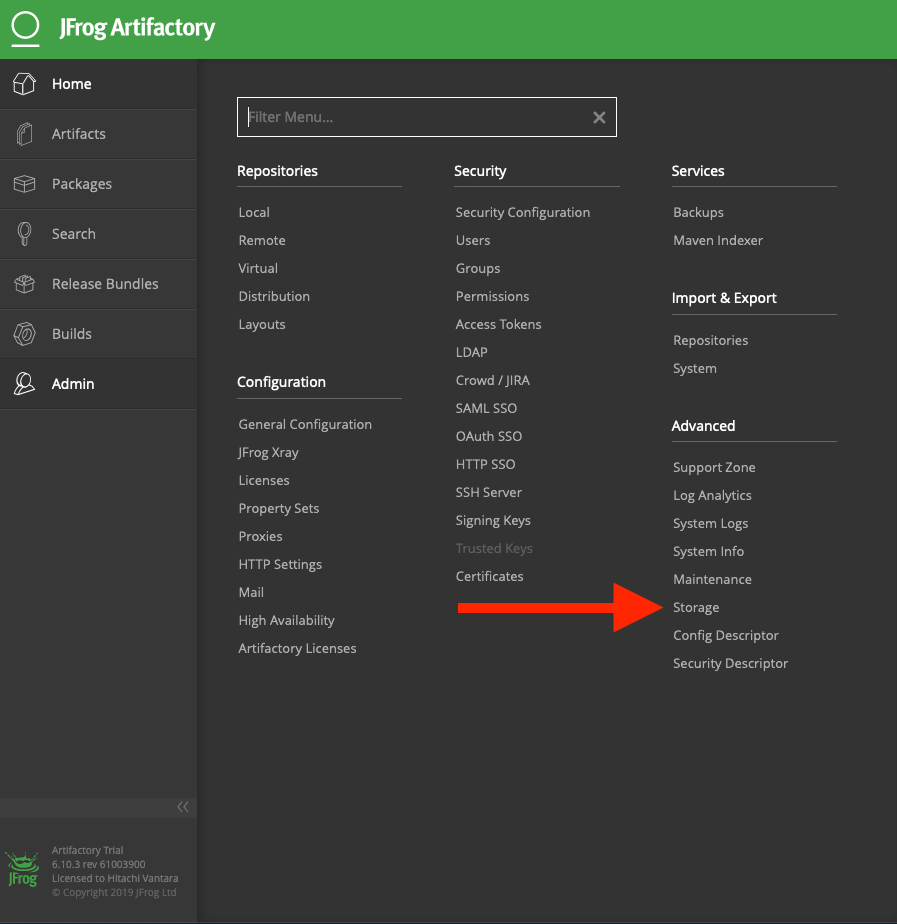
Browse to your Artifactory instance, click on Admin, and then select Storage (under Advanced).
You should now see that your primary storage is S3.
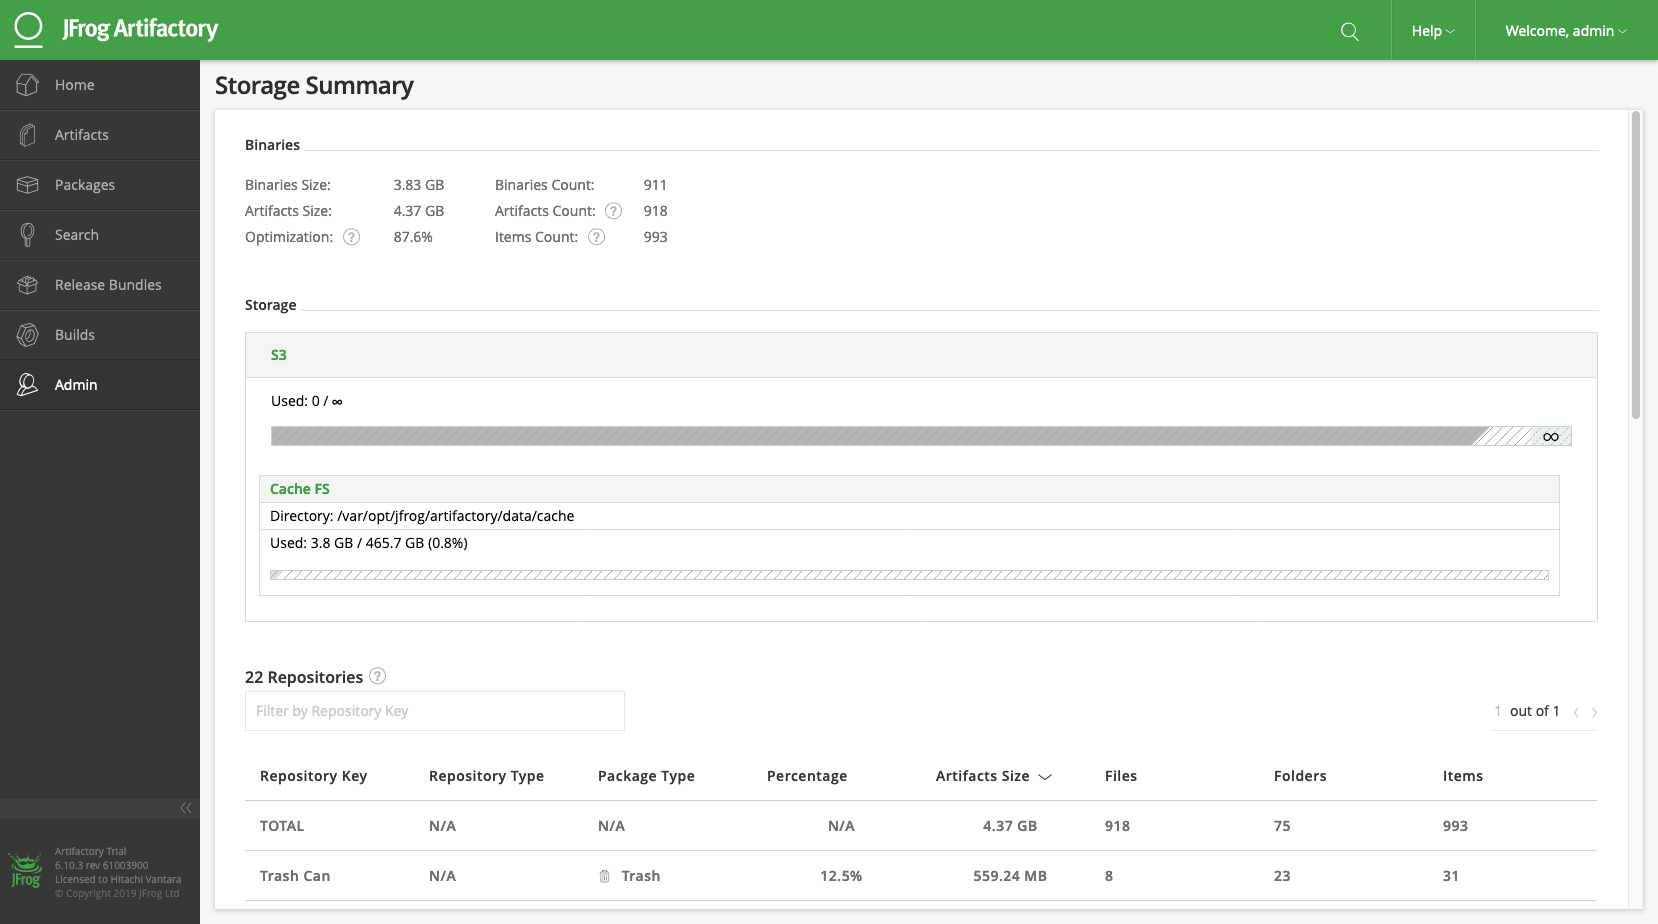
You'll notice that we also have a cache that will store data as it is ingested or requested. This helps keep things moving extra fast. Keep in mind that this cache is not stored on your HCP. Instead, it can be found on your instance's local filesystem.
And that's it! Congratulations! You now have Artifactory up-and-running with HCP as its backend storage. To learn more about HCP or Artifactory, check out the following: